I’ve spent more mornings than I can count standing on Welsh cobbles, watching terns spiral and sea foam gather along a line that seemed to hum with life. Over the years I learned to read those small signs — bird behaviour, foam lines, a ripple pattern — and to turn them into reliable feeding lanes that bring fish within casting range. Lately I’ve added a cheap drone camera to the mix and it’s transformed those guesses into near-certainties. Below is the step-by-step method I use to map hidden feeding lanes from shore using bird cues, foam lines and a budget drone. I write it from the bank, where the tide, weather and a pair of binoculars do most of the talking.
Why these three cues work together
Birds, foam and surface texture are immediate, living indicators of where food is being moved and concentrated. Birds frequently sit above active shoals or bait movements; foam lines trace converging currents that collect plankton and small fish; and surface texture reveals subtle changes in depth and flow. A cheap drone lets you validate what your eyes and binoculars suggest, giving a top-down perspective that’s impossible from the shore.
Essential kit
You don’t need high-end gear to get started. Here’s what I take on a typical reconnaissance session:
Step 1 — Scan the horizon and note bird behaviour
I start before launching the drone. I’ll park my rig, grab binoculars and watch bird activity for 10–20 minutes. Look for these behaviours:
Note the timing in relation to the tide. Birds often feed more actively on the incoming tide when bait is pushed into channels or up onto flats.
Step 2 — Read foam, colour and surface texture
With polarised sunglasses on, I sweep the surface from left to right and watch for:
Mark these visually relative to permanent features on the shore — a stack, a rock outcrop or a car park. I’ll take a photograph with my phone for reference before I move on.
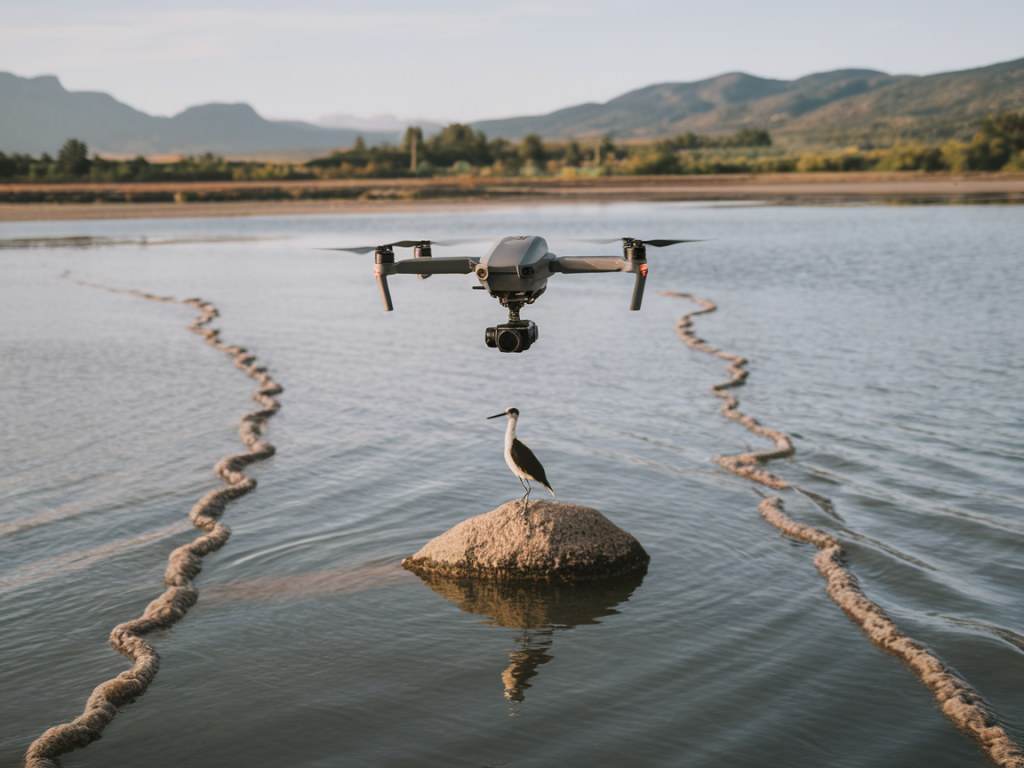
Step 3 — Launch the drone for a top-down check
Once I’ve gathered visual cues from the bank, I fly the drone to confirm. Keep it simple:
Use the drone footage to validate whether birds are feeding over a moving bait patch or simply resting. I’ve had plenty of sessions where inquisitive gulls gave the game away — the drone showed a long, thin bait ribbon moving parallel to the shore, and the birds were following it for half a kilometre.
Step 4 — Map the lane and sketch it
I combine the shore observations and drone images into a quick map. I draw a simple sketch in my notebook or annotate a screenshot on my phone. Include:
Label potential casts with distances. For example, “bank to foam line ~45m; possible deeper gutter at 60–80m.” Having exact numbers helps me pick the right rod and lead weight before I set up.
Step 5 — Choose tackle and approach
Matching gear to the mapped lane makes fishing efficient. For a typical feeding lane close to shore:
I’ll approach quietly, set up just behind a natural windbreak where possible, and cast slightly beyond the foam line so my bait drifts back into the feeding lane as tide and currents move it.
How to interpret changing conditions
Feeding lanes aren’t permanent — they shift with wind, swell and tide. My routine:
Legal, safety and ethical notes
Before flying, check local drone rules and respect wildlife. In the UK you must follow CAA rules, keep visual line of sight and avoid flying near people or protected bird colonies. Never chase birds with the drone or disturb nesting sites. On the water, follow local bag limits and handle fish carefully — I use a wet mat and barbless hooks when possible.
Quick drone specs to look for
| Feature | Why it matters |
| Camera 2.7K or 4K | Clear enough detail to spot bait slicks and gutters |
| 20–30 min flight time | Enough for a few short surveys without constant battery swaps |
| Compact/under 250g | Easier to fly legally in some regions (e.g. DJI Mini series) |
When you stitch these elements together — birds, foam lines and short drone reconnaissance — you turn coastal observation into an actionable map. It’s not rocket science, but it does reward patience, repetition and a willingness to get wet feet testing the lanes you identify. Tight lines, and if you’re around the Gower or Pembrokeshire coast, drop me a note and I’ll share a few local pointers I’ve picked up the hard way.